DIY Cultured Stone A Comprehensive Guide to Creating Stunning Stone Features at Home
Introduction Cultured stone, also known as manufactured stone or faux stone, is a popular choice for homeowners looking to add a touch of elegance and sophistication to their indoor or outdoor spaces. This versatile material offers the look and feel of natural stone at a fraction of the cost, making it an attractive option for DIY enthusiasts looking to enhance their homes with beautiful stone features. In this comprehensive guide, we will explore the world of DIY cultured stone, providing you with all the information you need to create stunning stone features at home. From understanding the basics of cultured stone to step-by-step instructions for installation, we will cover everything you need to know to embark on your own cultured stone project. Understanding Cultured Stone Cultured stone is a man-made product designed to mimic the appearance of natural stone. Made from a blend of cement, aggregates, and pigments, cultured stone is molded and colored to resemble a variety of natural stone types, including limestone, granite, and slate. The result is a versatile material that can be used to create a wide range of stone features, from fireplaces and accent walls to outdoor kitchens and landscaping elements. One of the key advantages of cultured stone is its affordability compared to natural stone. Cultured stone is typically priced lower than natural stone, making it a cost-effective option for homeowners on a budget. Additionally, cultured stone is lighter in weight than natural stone, making it easier to transport, handle, and install. Another benefit of cultured stone is its versatility. Cultured stone is available in a wide range of colors, textures, and styles, allowing homeowners to achieve their desired look and aesthetic. Whether you prefer the rustic charm of cobblestone or the sleek elegance of limestone, there is a cultured stone option to suit your taste. Choosing the Right Cultured Stone 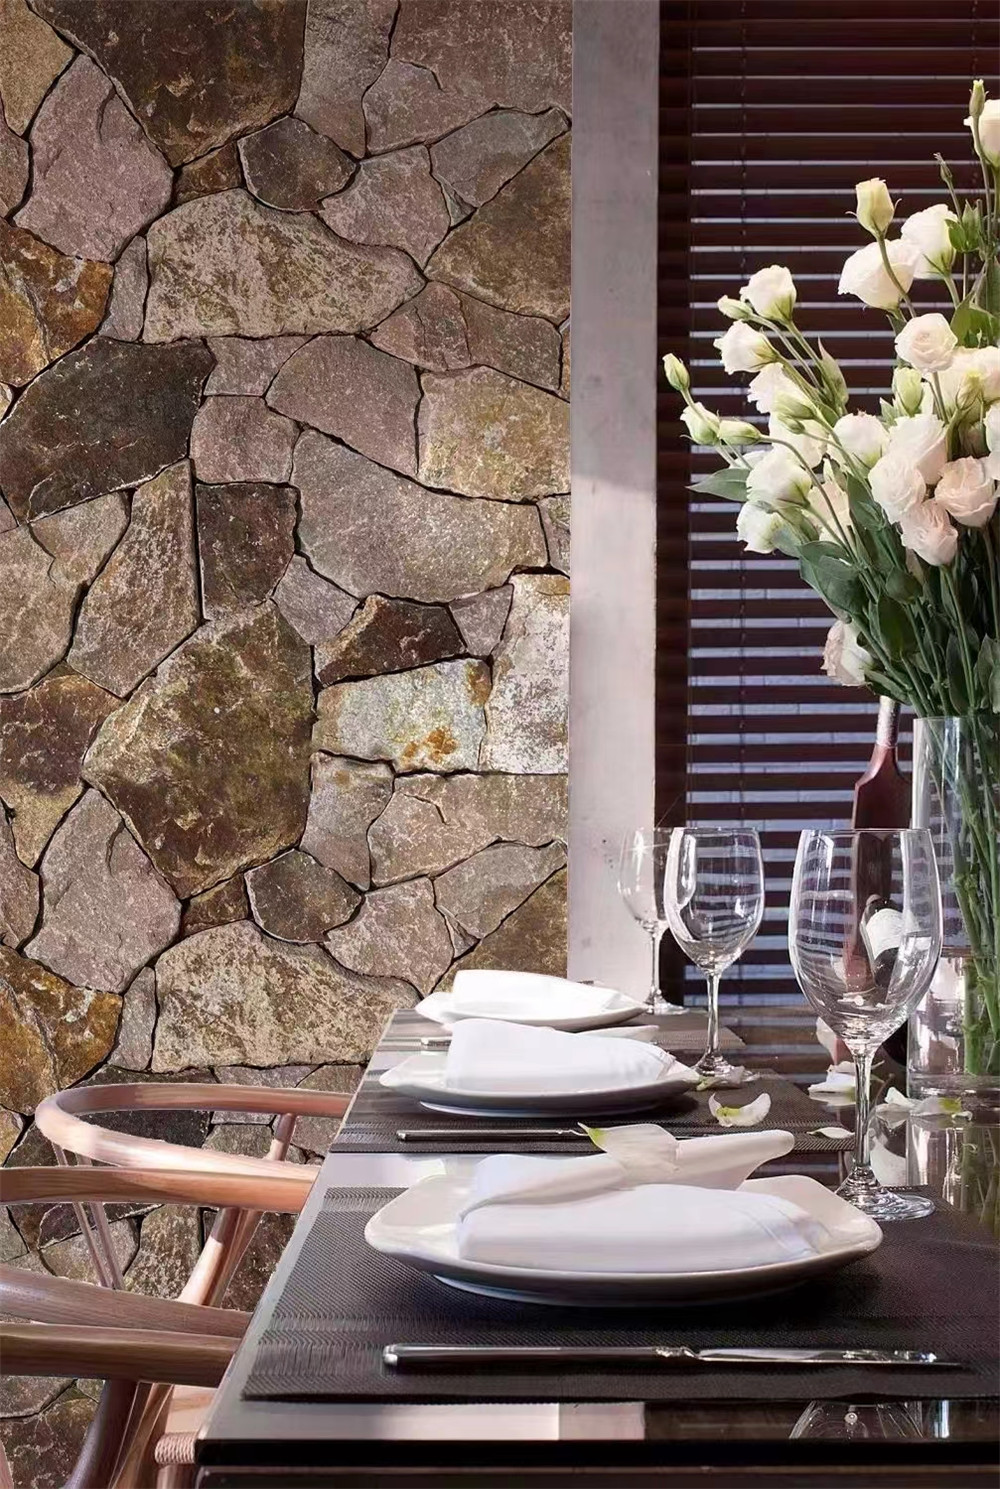 Before you begin your DIY cultured stone project, it is important to choose the right cultured stone for your needs. When selecting cultured stone, consider the following factors: 1. stepstone inc pavers : Cultured stone is available in a variety of styles, from traditional to modern. Consider the overall aesthetic of your home and the look you want to achieve when choosing a style of cultured stone. 2. Color: Cultured stone comes in a wide range of colors, including earth tones, grays, and whites. Choose a color that complements your existing decor and enhances the overall look of your space. 3. Texture: Cultured stone can be smooth or rough, depending on the desired look. Consider the texture of the cultured stone and how it will contribute to the overall design of your project. 4. Size and Shape: Cultured stone is available in different sizes and shapes, such as ledgestone, fieldstone, and cobblestone. Choose a size and shape that fits the scale of your project and enhances its visual appeal. 5. Quality: When selecting cultured stone, be sure to choose a high-quality product from a reputable manufacturer. Quality cultured stone will be durable, long-lasting, and easy to work with during installation. Preparing for Installation Before you begin installing cultured stone, it is important to properly prepare your space and gather the necessary tools and materials. Here are some steps to follow to prepare for your DIY cultured stone project: 1. Plan Your Design: Determine the layout and design of your cultured stone project, taking into account the size and shape of the area you will be covering. Consider creating a mockup or sketch to visualize the final result. 2. Gather Tools and Materials: To install cultured stone, you will need a variety of tools and materials, including a trowel, mortar mix, a level, a saw, safety glasses, gloves, and a respirator. Be sure to gather all necessary tools and materials before beginning your project. 3. Prepare the Surface: Ensure that the surface where you will be installing the cultured stone is clean, dry, and free of debris. If necessary, apply a waterproofing membrane or moisture barrier to protect the substrate from water damage. 4. Mix Mortar: Prepare the mortar mix according to the manufacturer's instructions. The mortar should have a thick, peanut butter-like consistency that is easy to work with but holds its shape when applied. Installing Cultured Stone With your space prepared and your tools and materials gathered, you are ready to begin installing cultured stone. Follow these step-by-step instructions to achieve professional-looking results: 1. Apply Scratch Coat: Before installing the cultured stone, apply a scratch coat of mortar to the substrate. The scratch coat provides a rough surface for the cultured stone to adhere to and helps prevent slippage. Use a trowel to apply the mortar evenly, creating a layer approximately ½ inch thick. 2. Apply Mortar: Using a trowel, apply a layer of mortar to the back of the cultured stone. Press the cultured stone firmly into place on the scratch coat, making sure to embed it securely in the mortar. Wiggle the stone slightly to ensure a strong bond. 3. Install Corner Pieces: For corners and edges, use corner pieces of cultured stone to create a seamless finish. Apply mortar to the back of the corner piece and press it into place, ensuring a tight fit with the adjoining stones. 4. Fill Gaps: As you install the cultured stone, fill any gaps or spaces between the stones with mortar. Use a pointing tool or trowel to press the mortar into the gaps, creating a clean and uniform look. 5. Check for Level: Periodically check the level of the cultured stone using a level to ensure that the stones are installed evenly and straight. Adjust the position of the stones as needed to maintain a level surface. 6. Allow to Cure: Once all of the cultured stone is installed, allow the mortar to cure according to the manufacturer's instructions. This typically involves allowing the mortar to set for 24 to 48 hours before applying any finishing touches. Finishing Touches After the cultured stone has been installed and the mortar has cured, you can apply the finishing touches to complete your project. Consider the following finishing touches to enhance the appearance of your cultured stone feature: 1. Clean the Surface: Once the mortar has cured, clean the surface of the cultured stone using a brush or damp cloth to remove any excess mortar or debris. This will help to reveal the natural beauty of the cultured stone and create a polished finish. 2. Seal the Stone: To protect the cultured stone from stains and moisture, consider applying a sealant to the surface. A high-quality stone sealer will help to prolong the life of your cultured stone feature and enhance its durability. 3. Add Accents: To further enhance the look of your cultured stone feature, consider adding accents such as lighting, plants, or decorative elements. These accents can help to create a focal point and add visual interest to your space. 4. Maintain Regularly: To ensure the longevity of your cultured stone feature, it is important to maintain it regularly. Clean the surface periodically, inspect for any damage or wear, and make any necessary repairs to keep your cultured stone looking its best. Conclusion DIY cultured stone offers homeowners a cost-effective and versatile way to enhance their indoor and outdoor spaces with the beauty of natural stone. By understanding the basics of cultured stone, choosing the right materials, and following proper installation techniques, you can create stunning stone features at home that will enhance the aesthetic appeal of your space. Whether you are looking to add a fireplace, accent wall, or outdoor kitchen, cultured stone provides a durable and stylish option that can be customized to suit your design preferences. By following the step-by-step instructions outlined in this guide and adding your own creative flair, you can achieve professional-looking results that will transform your home into a beautiful and inviting space. Embark on your DIY cultured stone project today and discover the endless possibilities of creating stunning stone features at home. With the right tools, materials, and techniques, you can bring the timeless beauty of natural stone into your home with ease and confidence.